Adobe Character Animator: a guide to animating your characters
13 April 2023 · tutorials, office software, adobe character animator
Updated in October 2026. This guide remains valid for recent versions of Character Animator; some labels may vary slightly from one version to another. The screenshots were taken in an earlier version, with the French interface.
The Character Animator interface
Here is an overview of the software's workspace, to help you find your way around the explanations below.
For more detailed information, please see the official Adobe page.
Workspace bar (at the very top of the interface)
It gives quick access to the software's different workspaces.

Rig workspace
To open it, select the Rig workspace in the workspace bar (or press Shift + Alt + 2 (Windows) or Option + 2 (Mac). This workspace lets you change the structure of a puppet. You can:
- Add or edit behaviours,
- Reorganise the puppet's layers,
- Add handles to a puppet,
- Edit keyboard triggers.
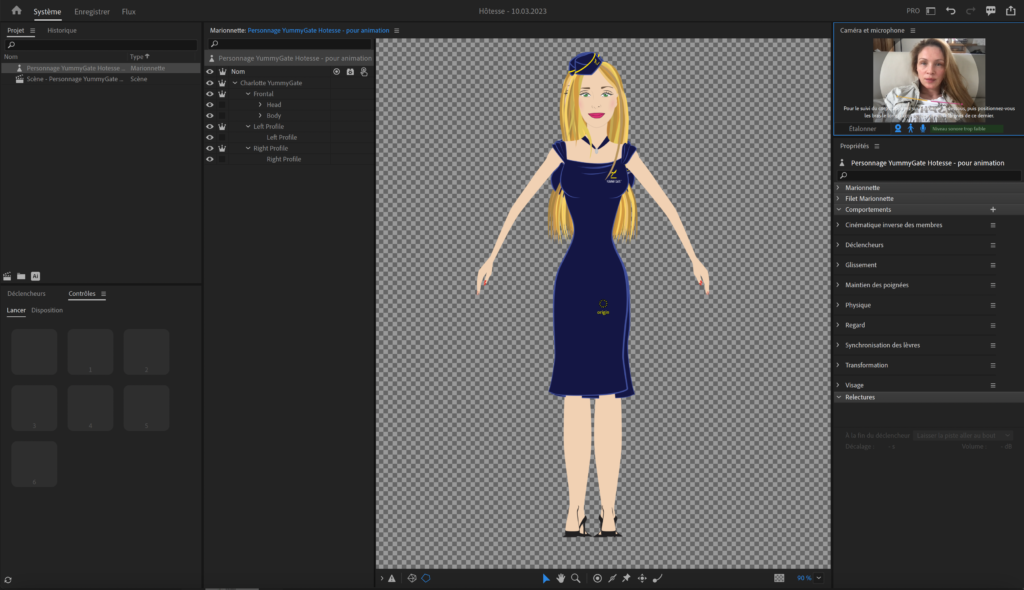
English / French feature names
- Dragger tool > Outil de Glissement
- Rig mode > Espace de travail système
- Taille > Hip
- Handle tool > Outil poignée
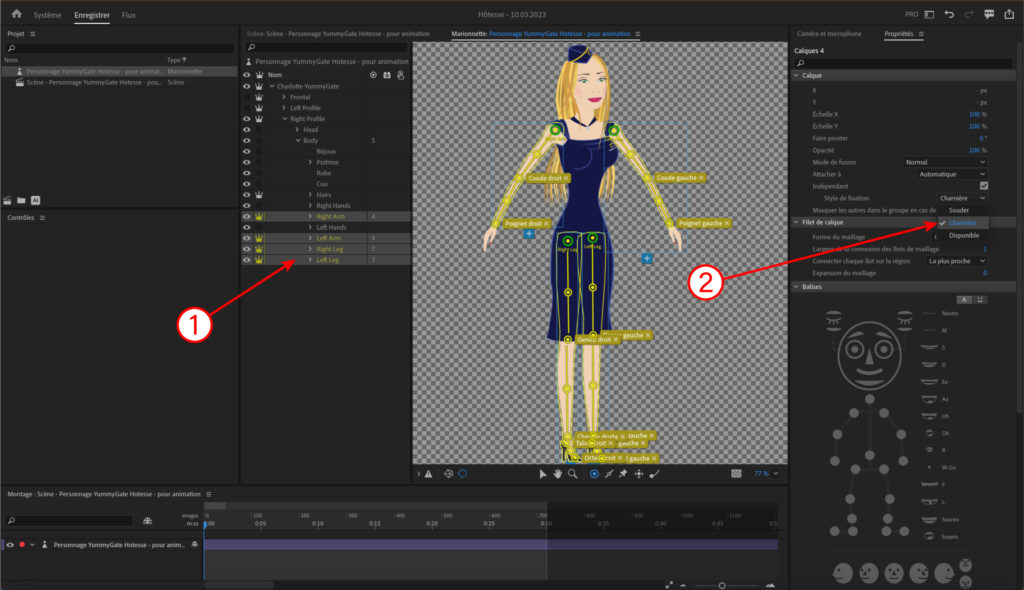
- Hinge > Charnière
Making a layer independent
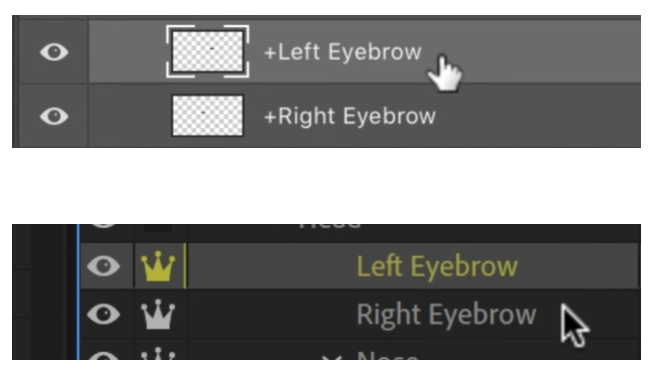
In Illustrator or Photoshop, putting a "+" sign in front of a layer name is a code that tells Adobe the layer is independent.
Here, putting a "+" on the eyebrows lets the software move the eyebrows without affecting the other layers.
In Adobe Character Animator, the "+" sign is shown as a crown icon.
List of layers to make independent
To save time, here is a complete list of the layers to make independent for a character (with their French equivalents):
- +Frontal > +Face
- +Left Profile > +Profil Gauche
- +Right Profile > +Profil Droit
- +Hairs > +Cheveux
- +Right Eyebrow > +Sourcil Droit
- +Left Eyebrow > +Sourcil Gauche
- +Talk Contents > +Contenu de conversation
- +Mouth > +Bouche
- +Sad Mouth > +Bouche triste
- +Right Eye > +Oeil Droit
- +Left Eye > +Oeil Gauche
- +Right Arm > +Bras Droit
- +Left Arm > +Bras Gauche
- +Right Hand > +Main Droite
- +Left Hand > +Main Gauche
- +Right Leg > +Jambe Droite
- +Left Leg > +Jambe Gauche
Mouths
- Neutral (default mouth)
- Smile (optional, additional mouth)
- Surprised (optional, additional mouth)
These are silent mouths and are only shown when nothing is being said into the microphone.
The optional mouths (Smile + Surprised) can be triggered when you smile or when you look really surprised.
Recording / editing mouth movements with a recording
Mouth movements can be edited or deleted directly in the Timeline.
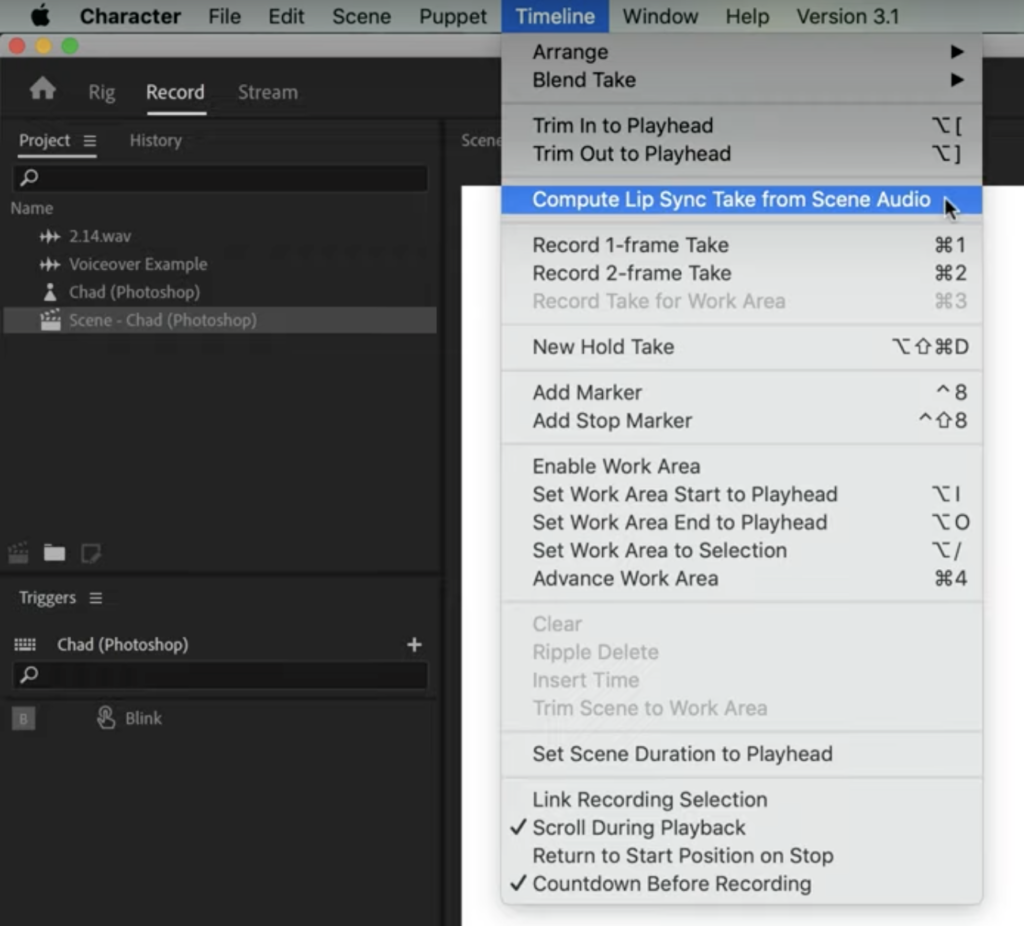
You can import pre-recorded voices straight into the Timeline: import the audio, then drag it onto the scene > select the character in the Timeline > Menu > Timeline > Compute Lip Sync Take from Scene Audio. Once this is done, turn off lip sync from the microphone to avoid any interference.
Disabling a movement
To disable a trigger, hold down the (Cmd) key and click the red button to the left of the trigger.
Fixing the character to the ground
In the puppet panel, select > Body > select the Handle tool (the double circle) > click on a foot > select the "Fixed" modifier.
Do the same for the other foot.
You can add another fixing point with the Pin tool (shaped like a drawing pin), which is a shortcut for the handle we have just used.
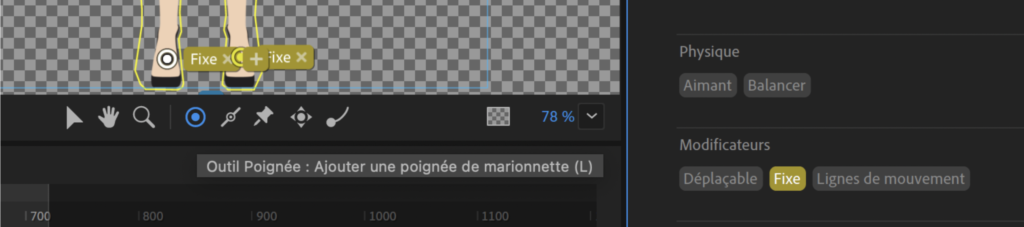
Setting up the different parts of the body
The arms
Attaching the arms
We want the arms to be attached at the shoulders, not at the elbows.
First, make sure the arms are independent (with the crown icon on each arm layer, or the "+" sign in front of the layer name in Illustrator or Photoshop).
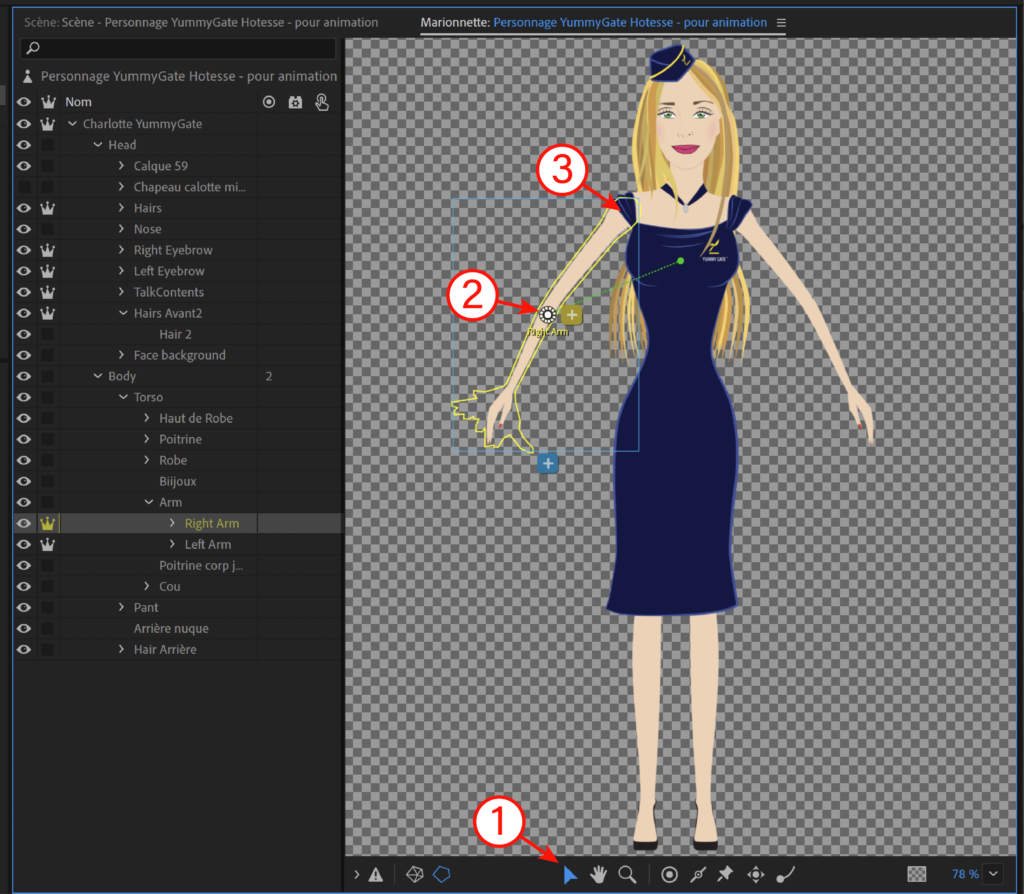
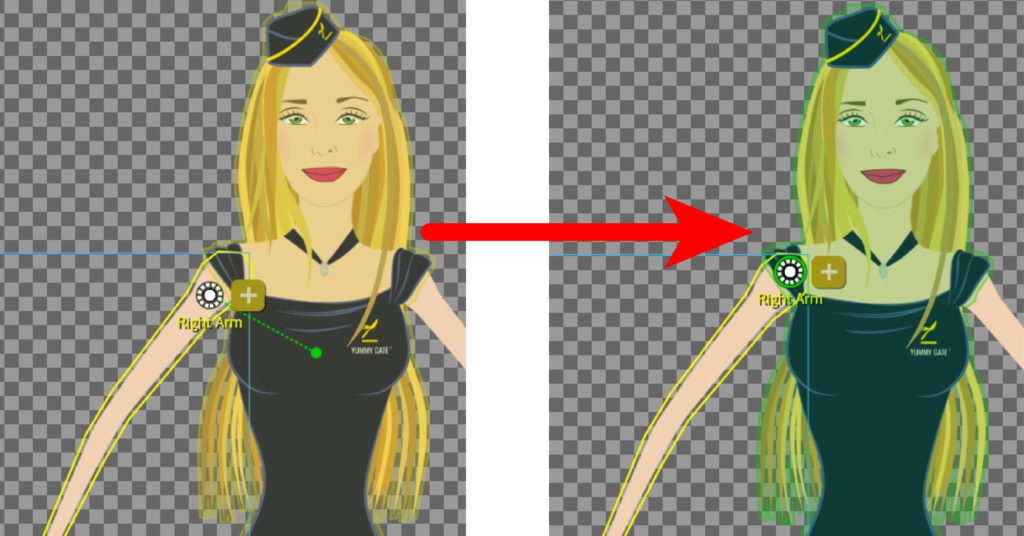
Then click the selection icon and move the cursor towards the shoulder until the outline of the selected layer turns from yellow to green.
This colour change means the two layers overlap (the upper arm overlaps the shoulder).
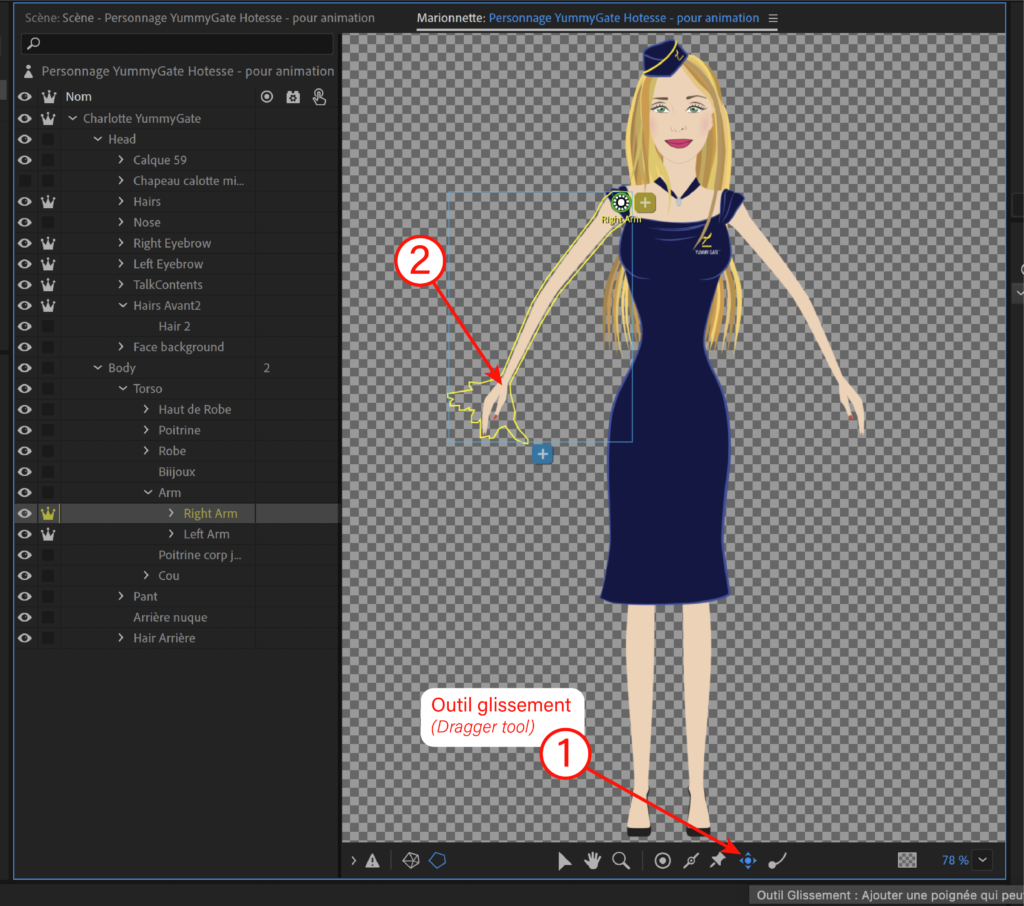
The Dragger tool
We can add another handle so that we can move this arm with the mouse, or with our fingers on a touchscreen device, using the Dragger tool.
- With the right arm group still selected, choose the Dragger tool in the bottom toolbar.
- Then click on the hand to add a draggable handle. Once the hand has been marked, keep this point selected and click where the hand is on the Character Animator character preview on the right of the screen.
The Handle tool
Do the same for the elbows and the wrist, but with the Handle tool (the dot inside a circle), then tag the matching areas on the character preview on the right of the screen.
Note: do not tag the shoulder on the character on the right at this stage. The shoulder can only be tagged on the character on the right when the body is selected. The same applies to all the limbs (arms + legs) connected to the "Body" group.
Next, select the Body layer, place the Handle tool cursor (dot inside a circle) on each shoulder, then tag them on the character on the right.
The Stick tool
To stop the arms looking like spaghetti, we give them more structure by adding a skeleton.
Go back to "Rig mode" and keep the right arm selected.
Click the Stick tool and drag it over the forearm and then the biceps to draw a simple two-part scaffold.
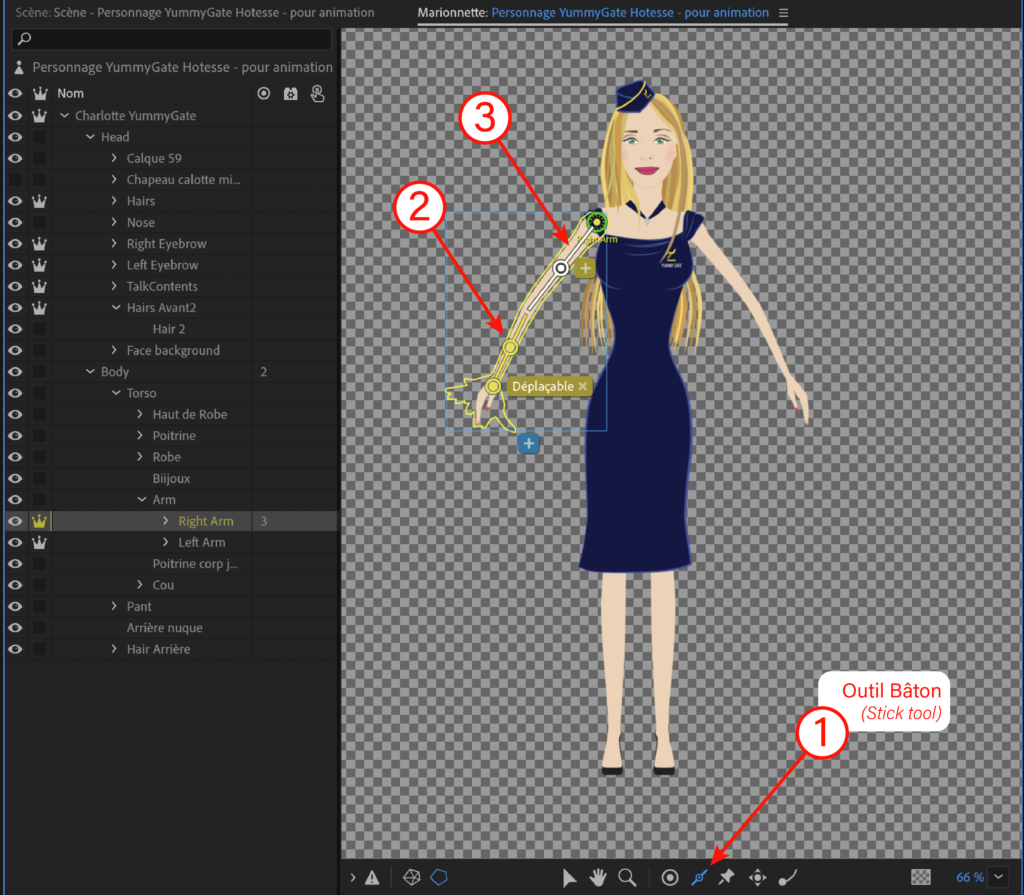
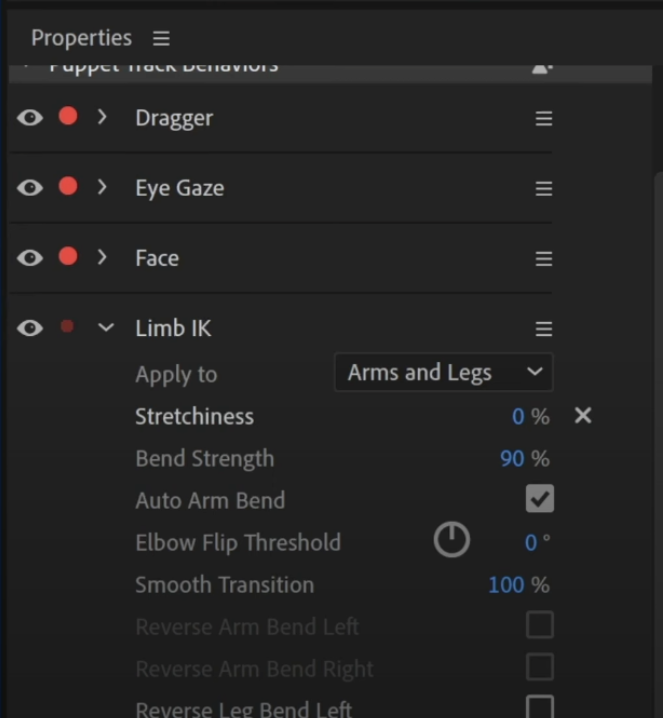
Adjusting arm flexibility (Limb IK)
To adjust how the arms behave, click on your character's layer, then add a new behaviour: "Limb IK" (called "Cinématique inverse des membres" in the French version).
The hands
Creating hand shortcuts
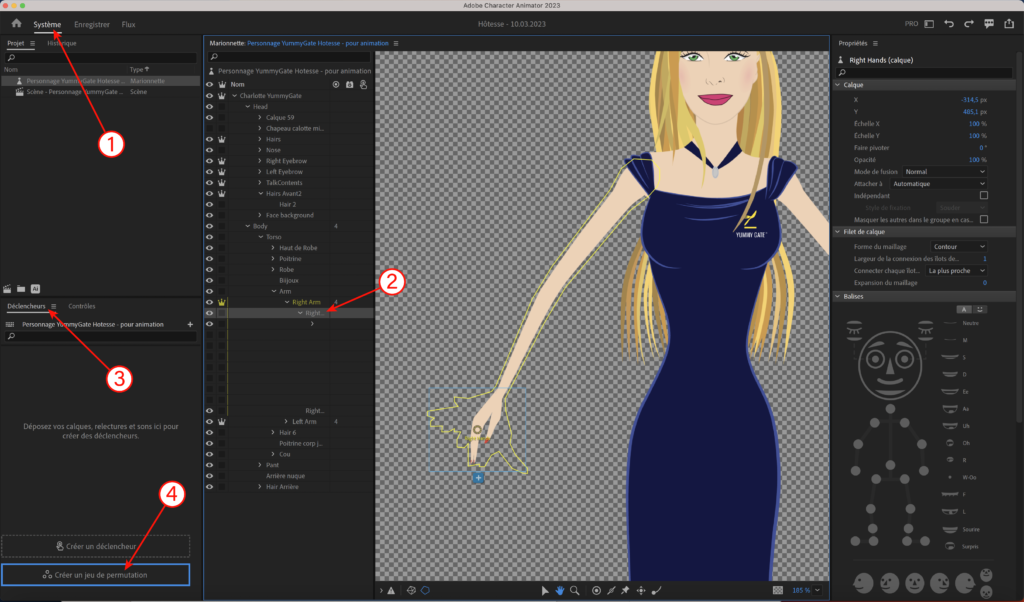
The hands must be grouped inside the arm's sub-layer.
- Click Rig (top left).
- Select the right-hand group, for example.
- Drag and drop the group into the Triggers panel on the left
- And drop it onto the icon that appears at the very bottom, called "Create Swap Set".
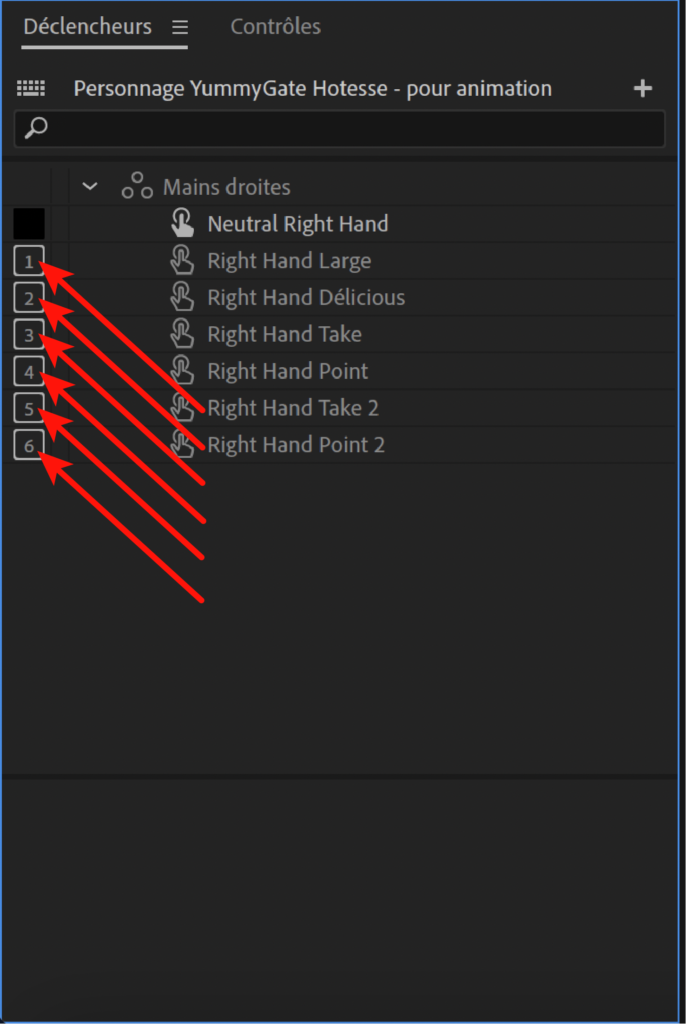
Simply enter numbers or keyboard characters in the small boxes so that the corresponding hand is selected.
However, it isn't easy to pick all the hand movements while animating.
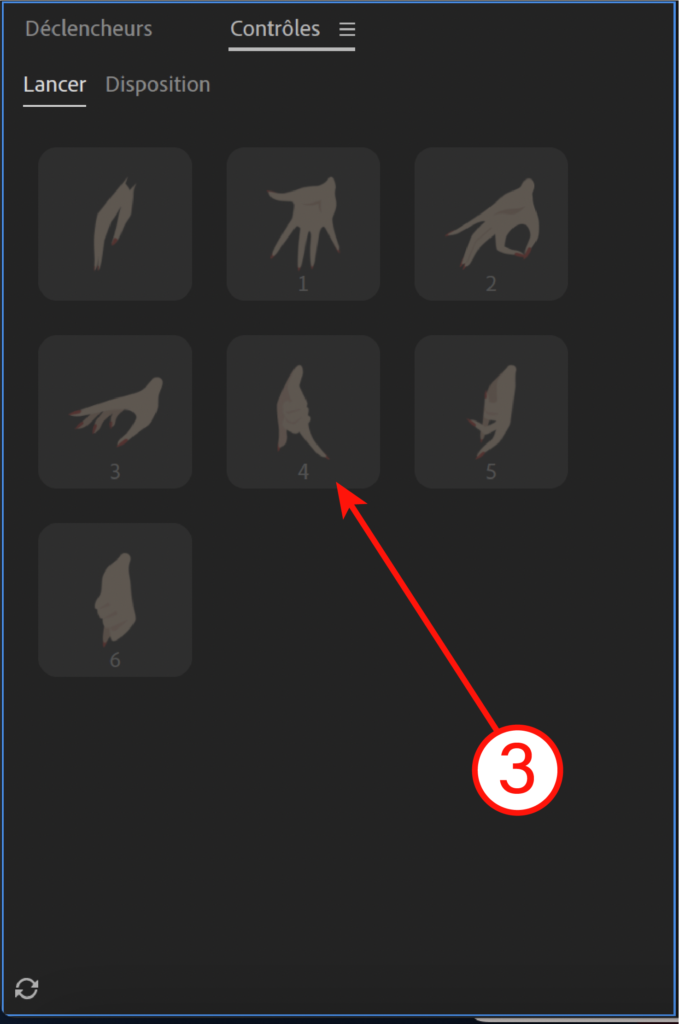
To make this easier, you can generate thumbnails for each movement.
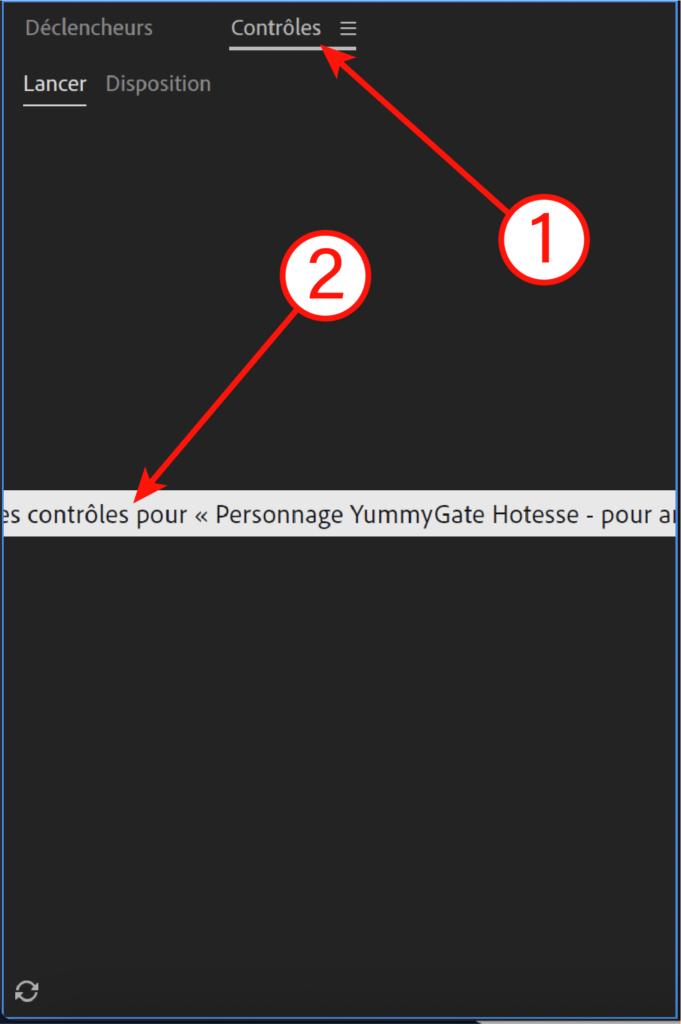
- Go to "Controls".
- Click "Generate controls for the puppet".
- And the thumbnails are created!
You can now click on them in the scene to change the type of hand.
The legs
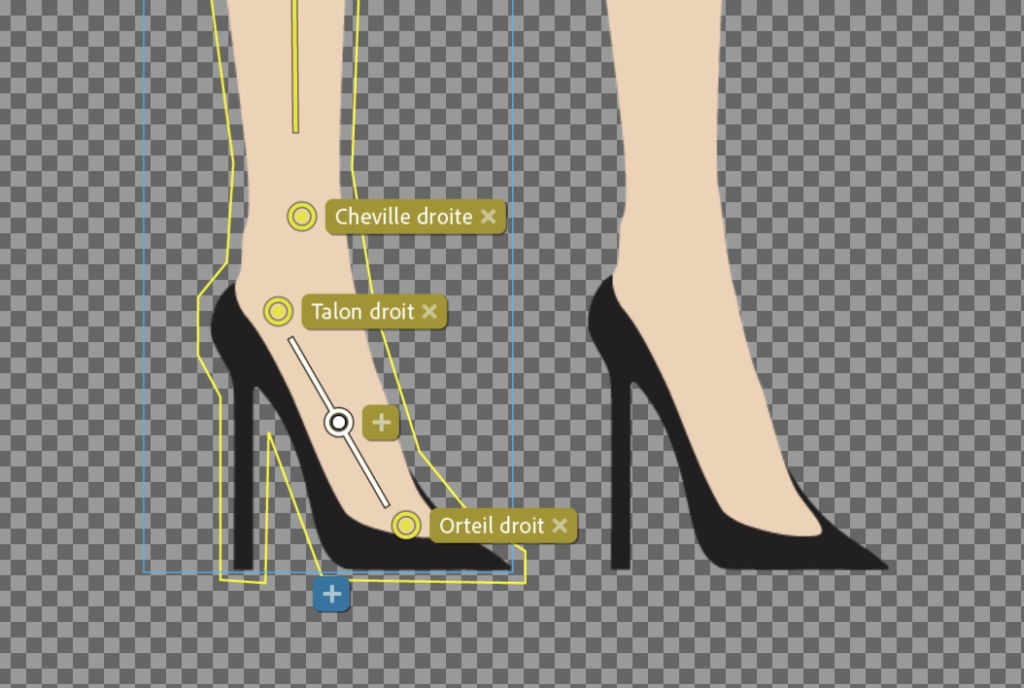
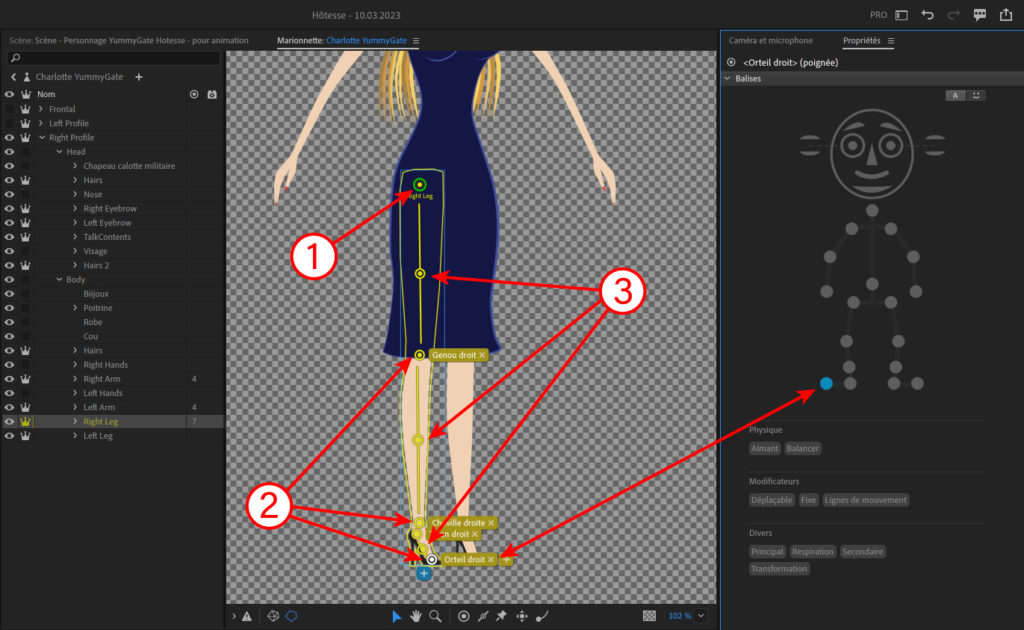
The procedure is the same as for the arms, except that the points linking the ankle to the foot are not joined with the Stick tool.
The body
Now comes the step where you attach the limbs to the body.
- Select the "Body" layer you created. You will see that the points at the top of the limbs created earlier appear in green.
- Select the Handle tool and add the different attachment points for the limbs.
- Link these attachment points to the character.
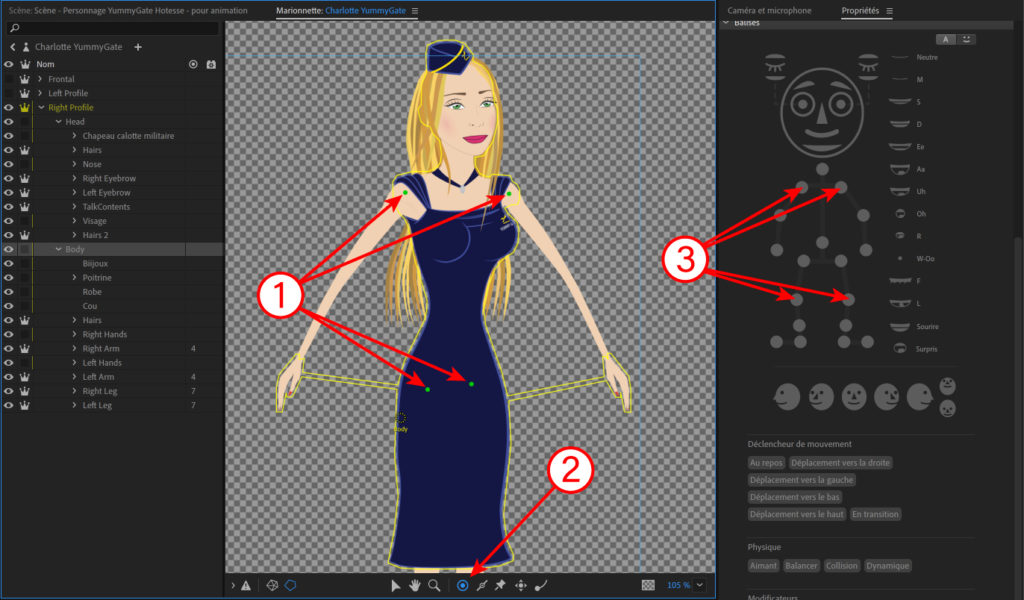
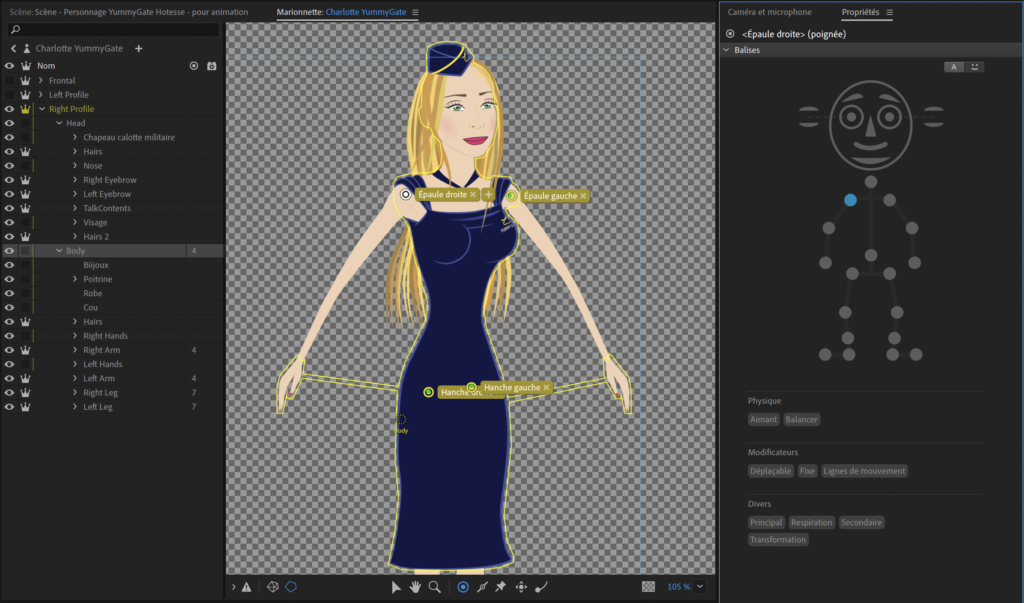
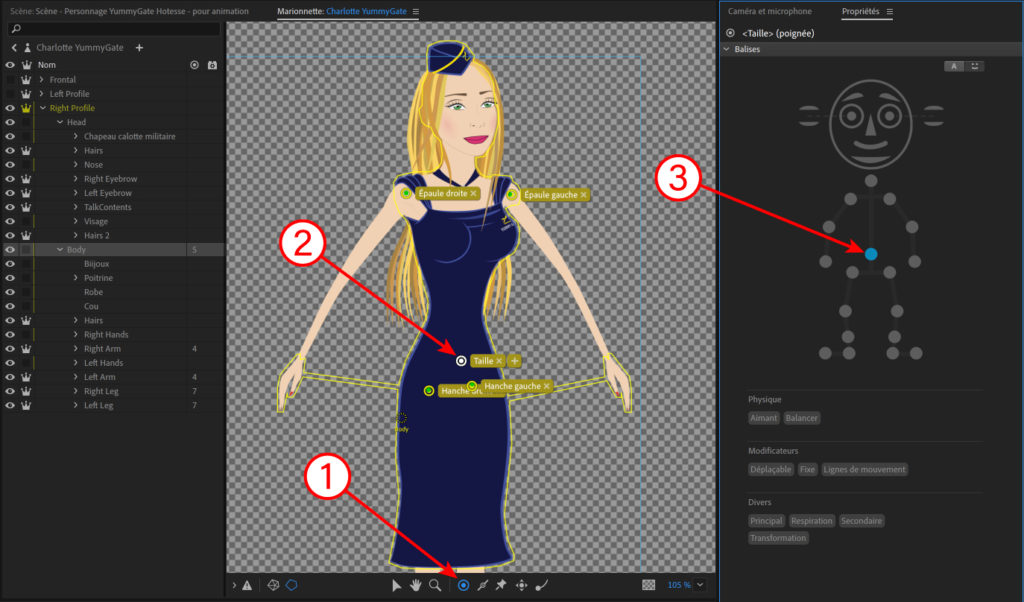
All that's left is to add the waist handle:
- Keep the "Body" layer you created selected.
- Select the Handle tool.
- Add a point at the waist.
- Keep it selected and add the "Waist" tag to the character.
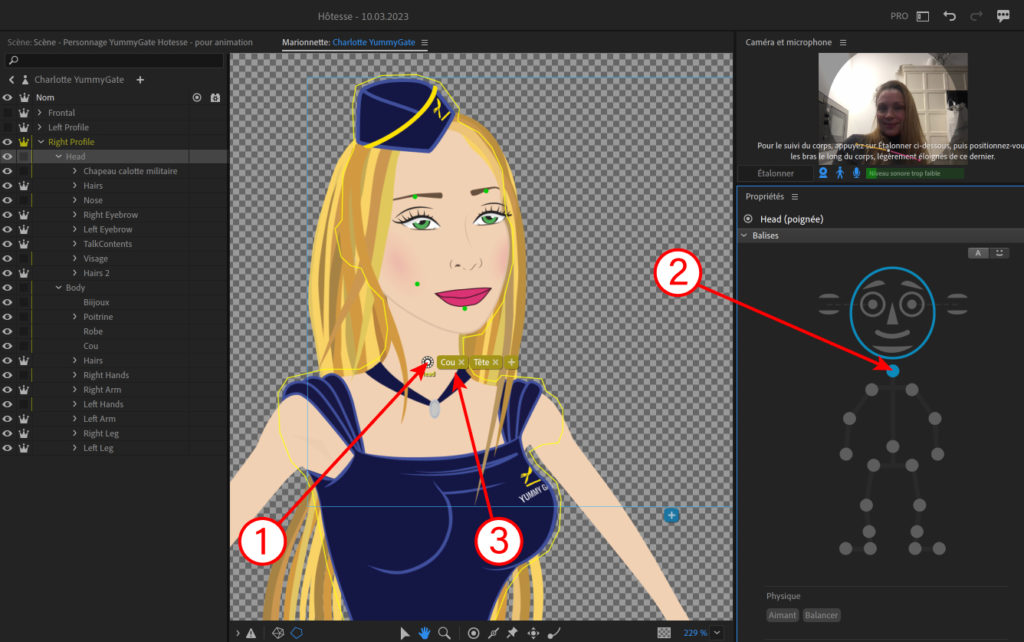
The head
Positioning the neck axis on the character is an important step, because this axis gives the head a natural up-and-down movement when the character walks:
- Move the central axis to the neck.
- Select the Neck tag.
- The Neck tag is then added here.
Correcting recordings
Once you have made a first recording, you can record over it, re-recording only certain parts of the character.
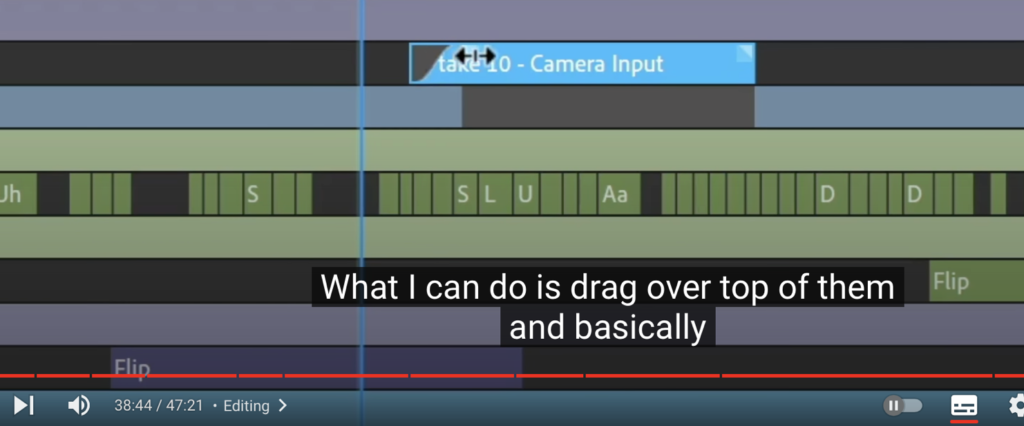
To make the new take invisible and blend it smoothly into the timeline, soften the transition using the take blend handles in the timeline, as shown in the screenshot here.
Adding a background image
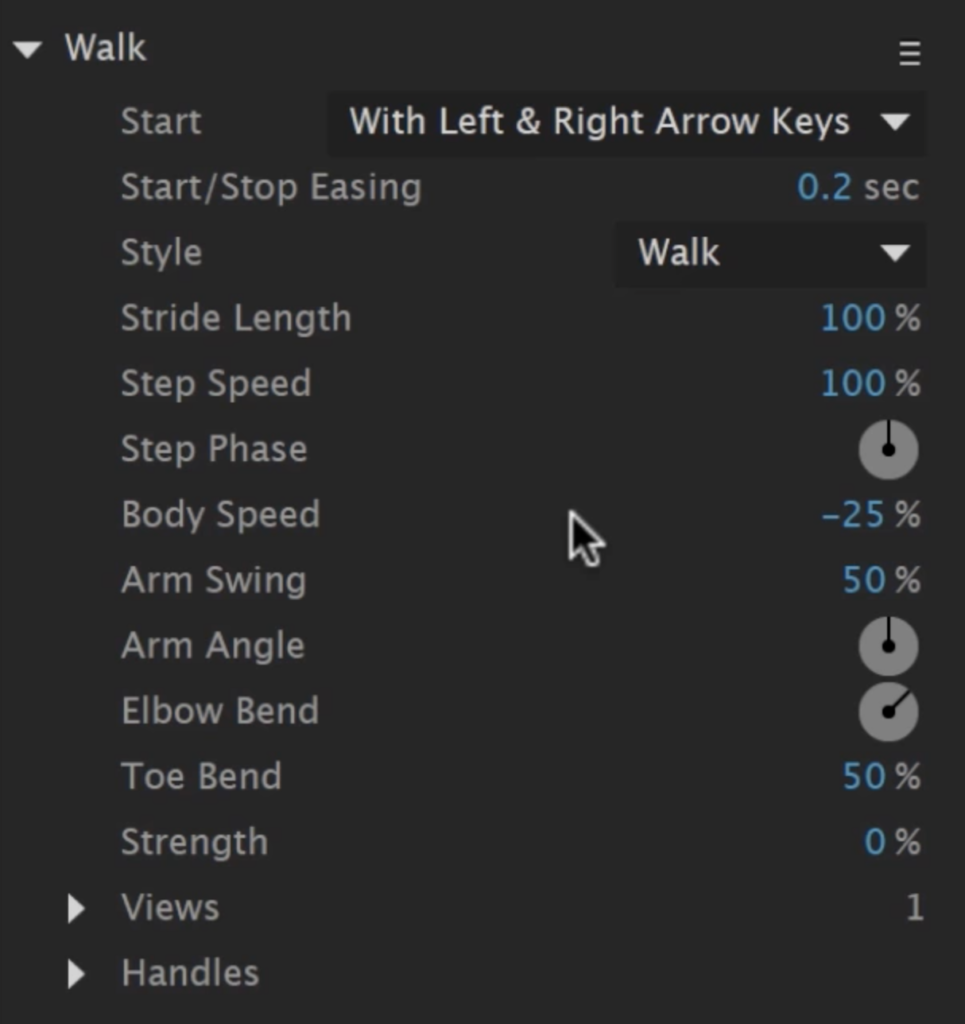
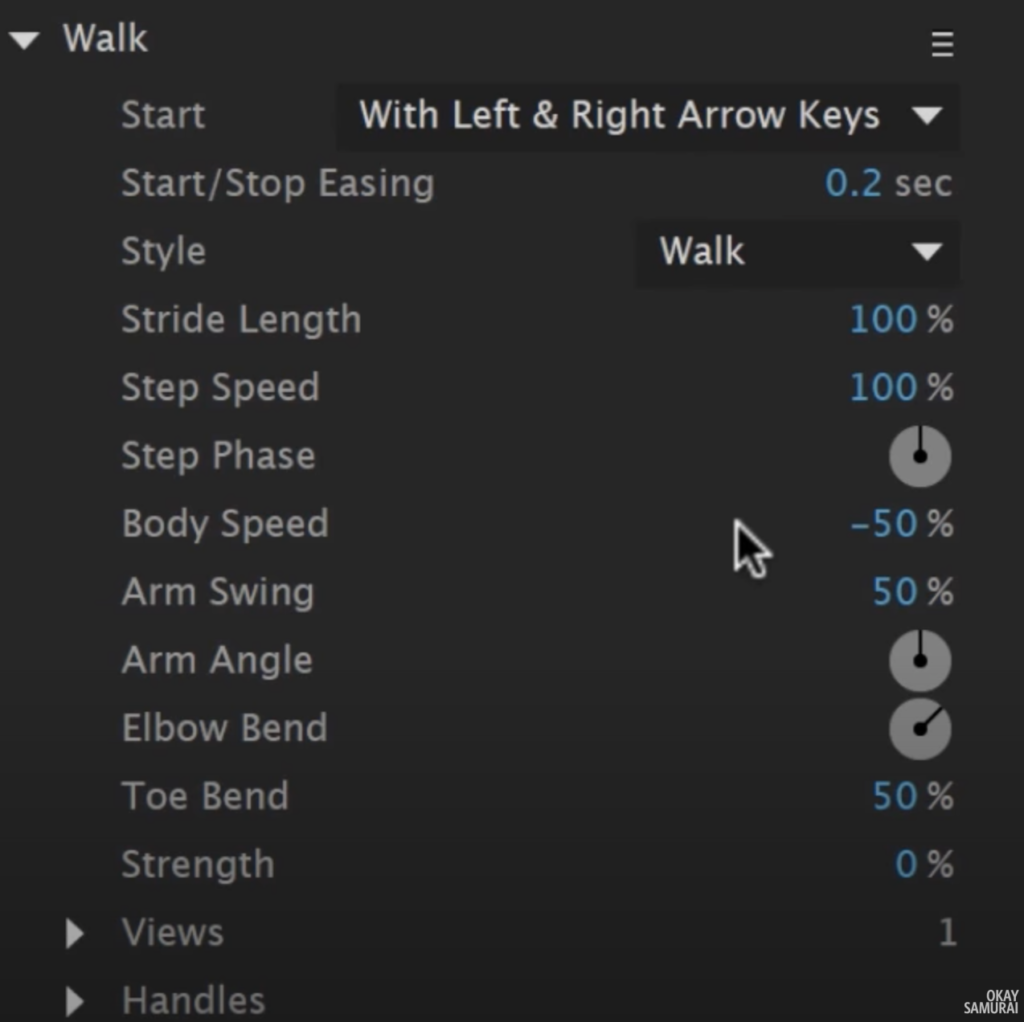
The background is split into two parts: the background images behind the character and the elements in front of the character. Each of these elements is set up differently, with different speeds and blur effects (for depth of field), so that they follow the character's movement naturally.
To add a background image, import the image file (Photoshop or Illustrator) into Character Animator.
(See Character Animator Tips & Tricks (February 2018) 8:36)
Let's start simply, with one background image and one image in front of the character.
Walk settings for the image behind the character:
Walk settings for the image in front of the character:
Then proceed as follows for both the image in front of and the image behind the character:
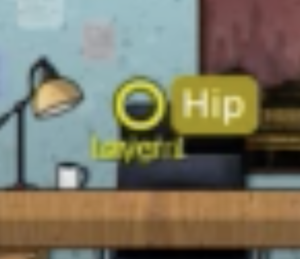
- Select the layer.
- Select the character's centre point on the right.
- Tag it as "Hip":
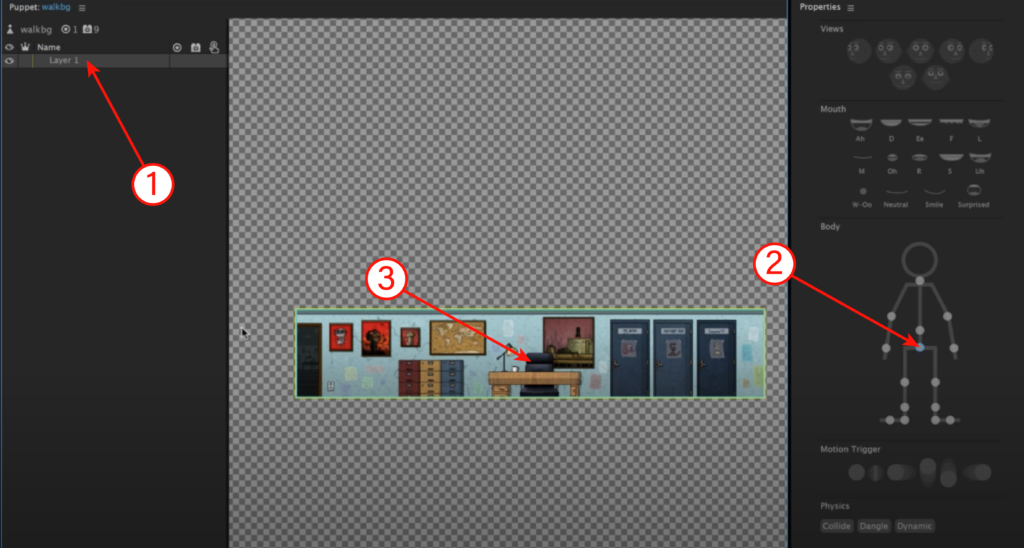
Setting up the character's walk
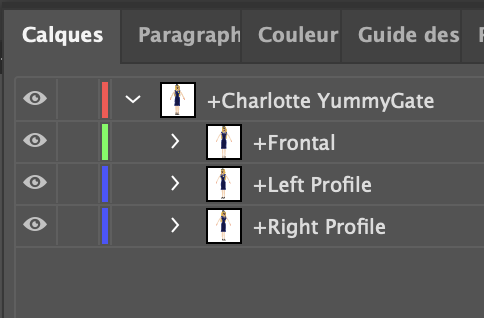
First, make sure your Photoshop or Illustrator file contains the following 3 layers. Each of these layers represents a position of the character (front / left / right).
You can also group these layers directly in Adobe Character Animator by going to: Puppet > Group Layers.
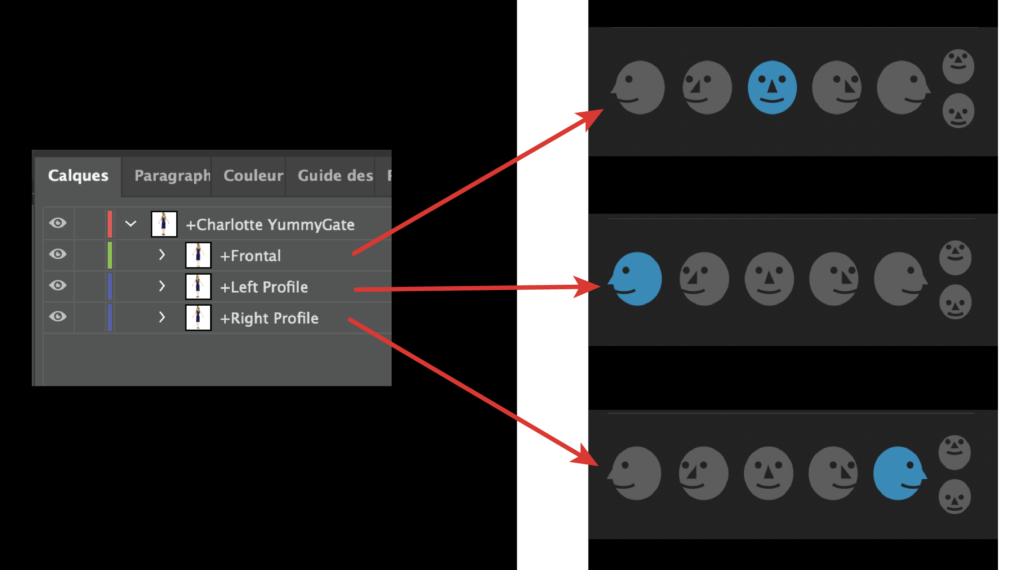
Then, in Adobe Character Animator, select the character's position for each layer.
To begin with, you can create a simple animated character with 3 positions, then refine it later with 2 more positions.
Note: when you start making the character walk, you will need to select all 3 layers (character + 2 backgrounds) in the timeline.
Enabling the "Walk" behaviour in the interface
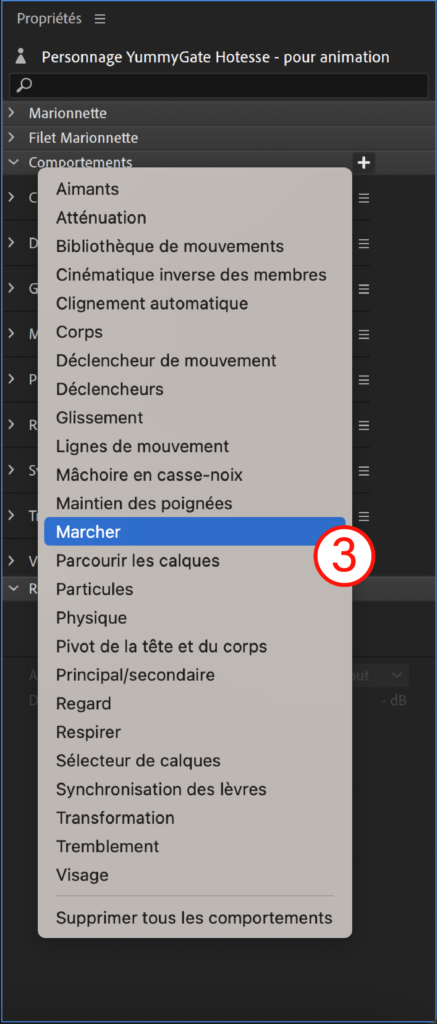
Next, enable the "Walk" behaviour. To do this:
- Click on the character's name.
- In the "Properties" panel on the right, click the small "+".
- Select "Walk".
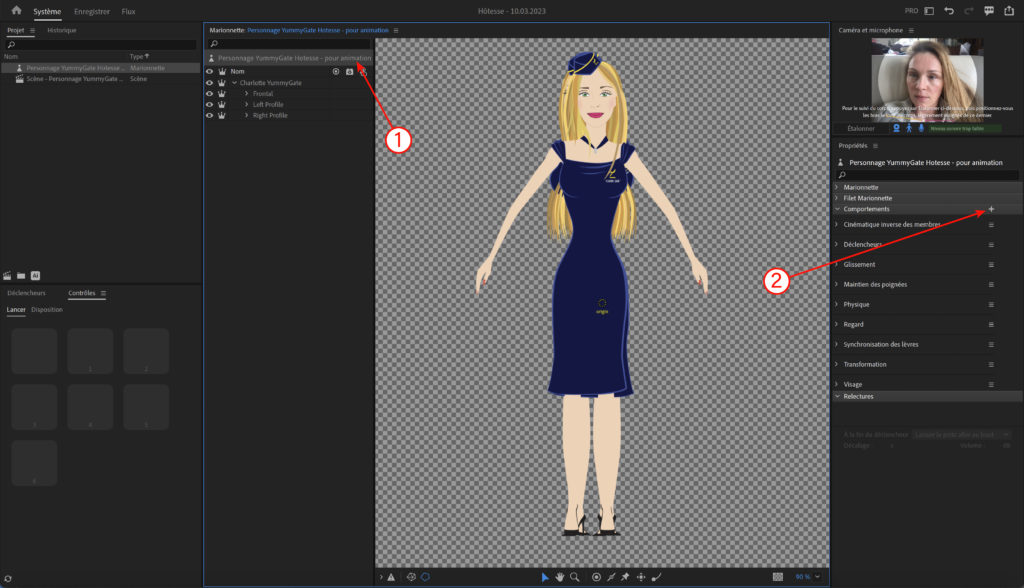
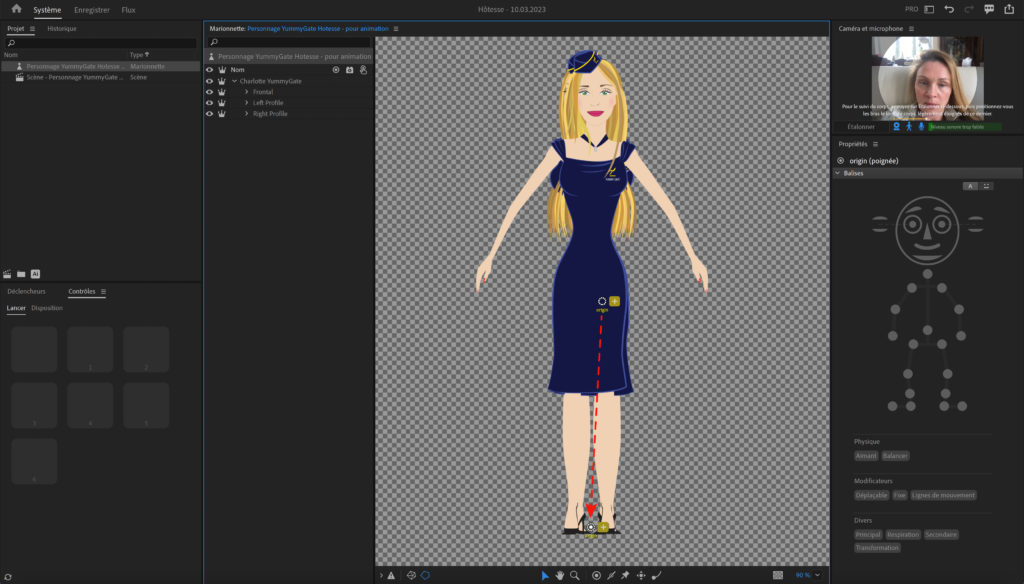
Next, place the character's origin point towards the bottom of the character, at foot level.
This origin point is the axis around which the character turns, pivots or spins. If the character were a star, for example, you would leave the origin point in the centre.
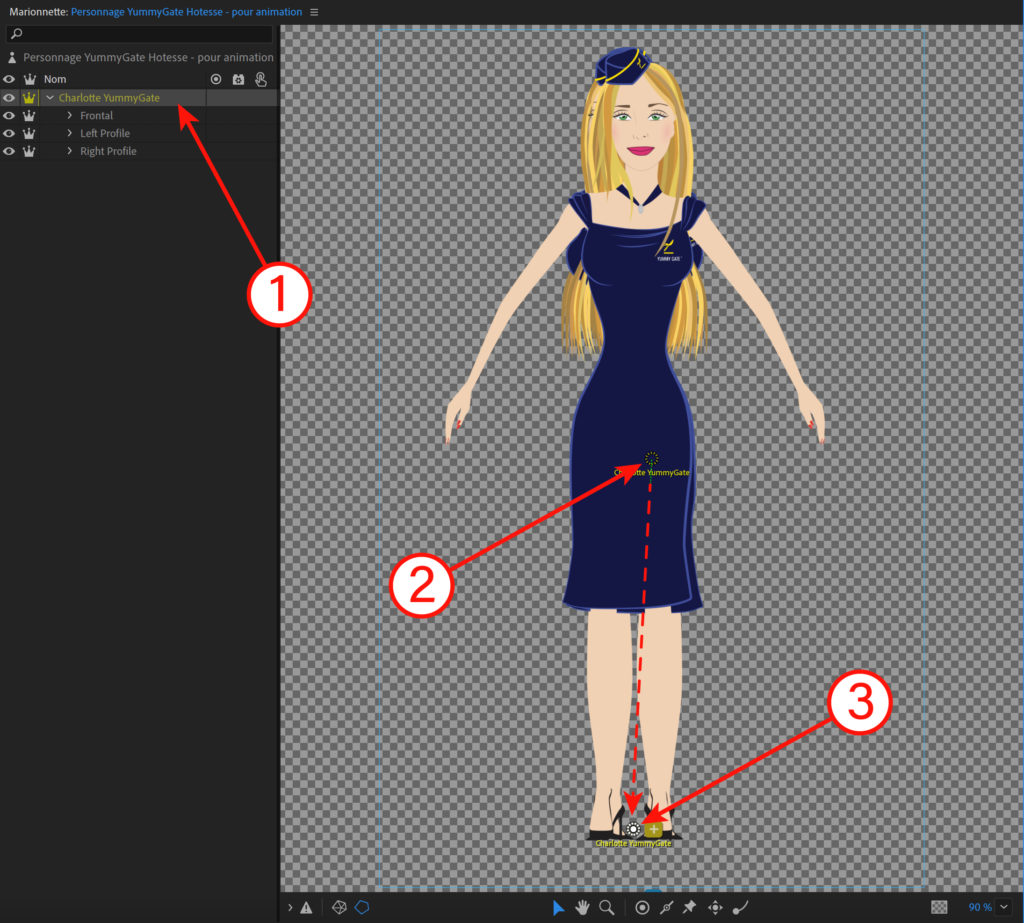
Then do the same for the character group (named Charlotte YummyGate), as shown here:
Setting the walk style
- Double-click the character's name so that its behaviours appear on the right.
- Check that the number "1" is shown for all the handles.
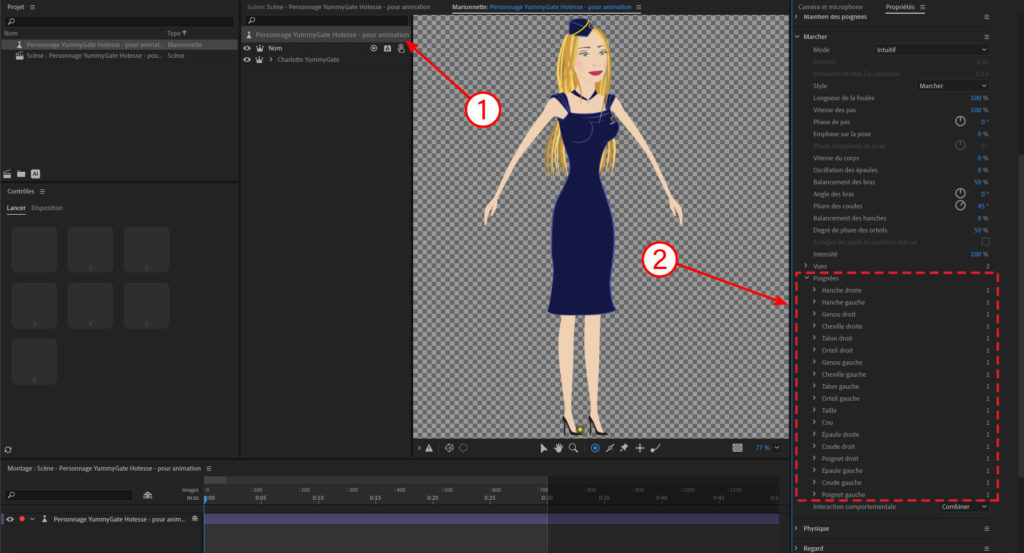
- Holding down Cmd or Ctrl, select the arms and legs you have just set up.
- In the right-hand panel, select > Layer > Attach Style > Hinge.